How to build a level model
· Introduction
This tutorial describes how to build a level using 3D Studio Max and export it, using the supplied BSP export plug-in. If you have not got access to 3D Studio Max you can go direct to tutorial 3 and use the supplied BSP files.
At the end of the operations exemplified in this tutorial, we have constructed the geometry of a level (stored as a .max file).
· 3D Studio Max operations
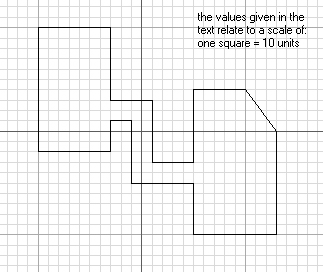
1) Draw a plan view of the level using the line tool. The plan of the model must consist of a closed polygon.
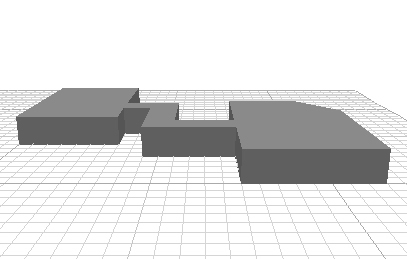
2) Use the extrude modifier to convert the plan into a 3d model.
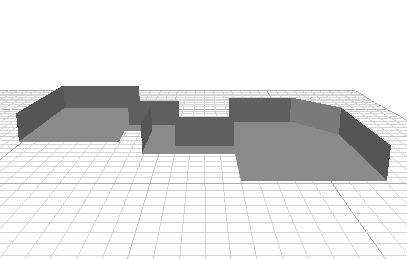
3) Invert the face normals using the edit mesh modifier. This is done by selecting the face mode in the edit mesh modifier, selecting all faces from the model with a selection window and then clicking the invert normal button from the edit mesh modifier. This is an import step, and converts the model from a normal 3d graphics object, with outwards facing normals, to an interior.
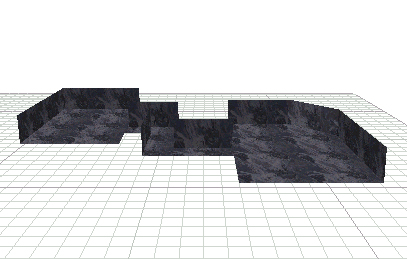
4) Create the texture co-ordinates using the UVW Map modifier and select box mapping. Set the length, width and height to apropriate values for your level.
5) Define the required materials using the standard material with bitmap diffuse mapping and apply it to the model. You can also apply different materials to different parts of the model.
6) Create some light objects (you can use simple small box objects for example). Place the lights in appropriate positions and apply a standard material with self illumination value larger then 0.
7) Associate real dimensions to your model by setting the desired values in the Preferences menu on the general tab system unit scale. For example, for a wall of 50 units length, you might set 0.2 unit = 1 meter, making the virtual wall 10 meters long.